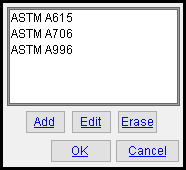
The Rebar Specifications window ( Job Settings )

Select a specification, then press " Edit " or " Erase ." You can " Add " without selecting a specification. The list updates as changes are made, but your changes do not become permanent until you press " OK ."
page 1 | contents | home > project settlngs > job > rebar > | classic | top
To open Rebar Specifications :
Method 1 : Home > Project Settings > Job > Rebar > Rebar Specifications .
Method 2 : In Modeling or the Drawing Editor , choose Settings > Concrete Settings > Job Concrete Settings > Rebar Specifications (classic), or use a keyboard shortcut , or click the icon.
page 1 | contents | home > project settlngs > job > rebar > | classic | top
To close Rebar Specifications :
![]()
![]()
"OK" (or the Enter key) closes the Rebar Specifications window and saves the settings on it to the Job Settings file in your current Job .
"Cancel" (or the Esc key or the
button) closes this window without saving any changes made to it.
page 1 | contents | home > project settlngs > job > rebar > | classic | top


